Sugar and Spice and Crochet All the Things!

Tags

,

So, my best friend just had a baby girl.  And she is the cutest baby!  I don’t even have to lie about how cute she is, which always a relief, because, well, not all babies are cute.  And I’ve been so excited about this baby girl, that I’ve had this problem where I just want to crochet all the things.  I feel as if every adorable baby girl yarny thing I see on Pinterest or Ravelry must be hooked up immediately.

I just can’t feasibly crochet all the things, so I crocheted several things.  I made booties the weekend before my first exam of the semester, and then, after a short break from that to study, I went and made her a matching hat.  Because she can’t have booties without a matching hat.

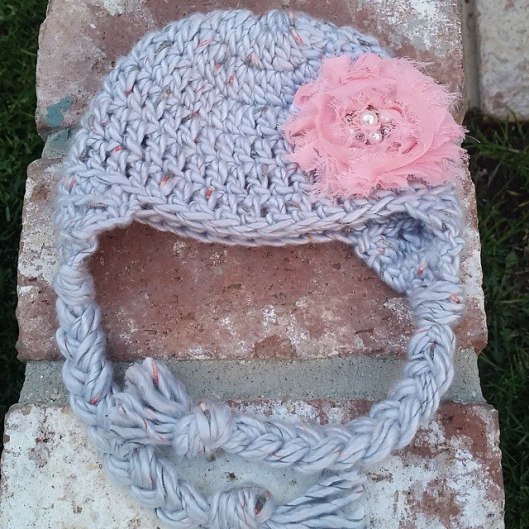
Sugar and Spice Earflap Hat by DandelionDaze

The design for the hat was one that I improvised, and it’s pretty simple.  I used Yarn Bee Confection Chunky from Hobby Lobby, which is a super soft yarn.  This color is called Rock Candy.  I believe I used a J hook, and the hat should fit a 3-6 month old.  You can follow my basic design below and continue increasing until you have the size you need, then continue with rounds with no increases until you have your desired length.  Of course, the yarn and hook you use will affect the size of your finished item, as well.

Sugar and Spice Earflap Hat:

Round 1: Magic circle, with 12 dc in the circle
Round 2: Ch2, 2 dc in each stitch (24 sts)
Round 3: Ch2, 2 dc in same stitch as join, 1 dc in next, repeat around (36 sts)
Rounds 4-7: Ch2, 1 dc in each stitch around (36 sts)

Earflaps:
Round 8: Ch2, hdc in next 9 stitches, turn
Round 9: Ch1, 2hdctog, 1 hdc in next 5 stitches, 2hdctog, turn
Round 10: Ch1, 2hdctog, 1hdc in next 3 stitches, 2hdctog, turn
Round 11: Ch1, 2hdctog, 1hdc in next stitch, 2hdctog, turn
Round 12: Ch1, 2hdctog, 1hdc next stitch, turn
Round 13: Ch1, 2hdctog, finish off
Skip 9 stitches on Round 7 and make the second earflap as above.

Braids:
Cut several lengths of yarn, a little longer than twice the length you want the braids to be.  For bulky yarn like this, I cut 9 pieces per braid.  You’ll fold them in half (so now you have 18 pieces of yarn, or double the amount you cut) and take the loop of the folded end and pass that through the end of one of the earflaps.  You can use your hook to make a little hole if the stitches are tight, and you can also use the hook to help pull the looped end through.  Then pass the cut ends through the loop and pull tight.  Now, seperate the yarn into 3 equal sections and braid.  When you get to your desire length, tie the end in a knot and cut off the excess.  Repeat this for the other braid.  Sometimes it takes a little trial and error to get the right lengths of yarn, so you don’t end up with little dinky braids, or tons of 6 inch pieces of yarn left.

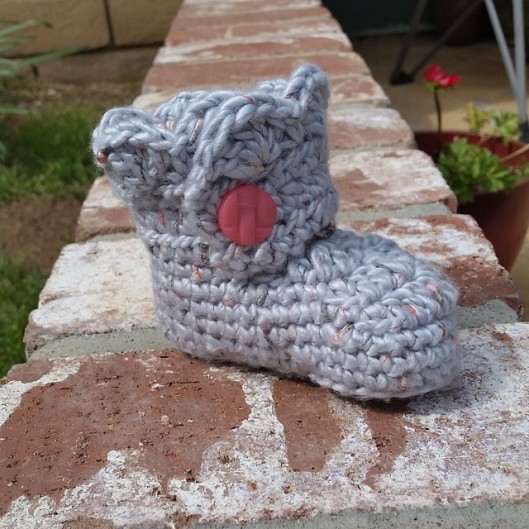
For the booties, I used a free pattern from Ashlee Marie, which you can find here.  This is the second time that I’ve used her pattern for a pair of baby booties and both moms loved them!  You can also leave off the scallops for a boy.

Ugg Inspired Baby Boots by DandelionDaze

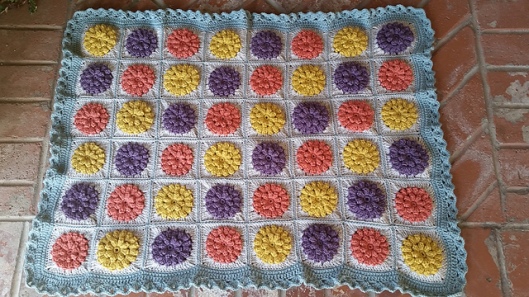
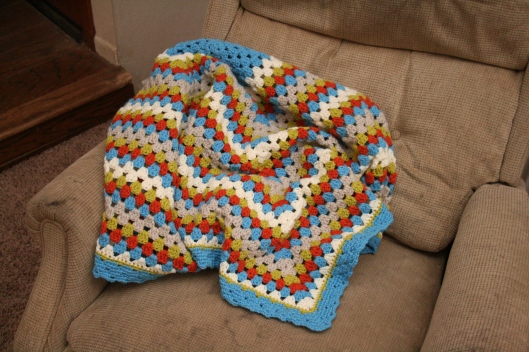
Finally, I also made a blanket for my new little love.  I used the Something Pretty pattern by Mille Makes.  And I think it came out quite pretty.

Something Pretty Blanket by Dandelion Daze

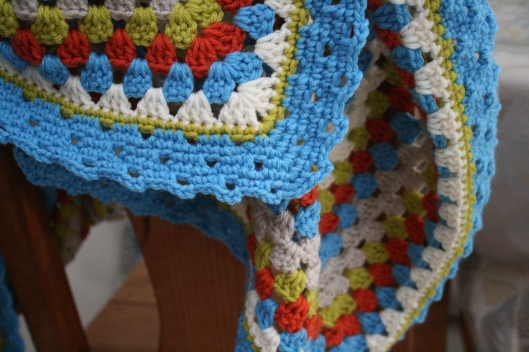
I attached the squares using the zipper method by Look at What I Made.  It takes a little fiddling to figure it out, and it does take longer to do than joining with single crochet, but it looks quite nice.

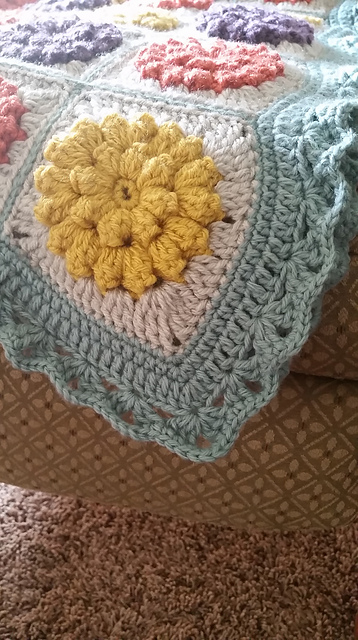
I improvised the pattern for the border.  I didn’t like that I couldn’t seem to get it to lay flat.  But my friend says that she actually likes the way it looks a bit ruffly, so it worked out!

For the border, I did 1 round of sc around, 1 round of hdc around, and 1 round of dc around.  In the corners on each of those rounds, I made 3 stitches in each corner stitch to increase. Then, I did a 4th round of 2dc, ch3, 2dc in one stitch, sk 3, repeat around. In corners for the 4th round: 3dc, ch3, 3dc all in corner st. Finally, I did a 5th round of 1sc in top of each dc and 3sc in ch spaces.

Something Pretty Blanket by DandelionDaze

I also made a little elephant for her, but that was months ago, when we first found out that she was having a girl.  I shared it in another post, but for fun and because I think it’s adorable, here it is again 🙂

Baby Elephant by DandelionDaze

The pattern is available for purchase on Ravelry here.  It’s worth the money, in my opinion, as the pattern is quite well-written and has instructions for both a an elephant and a hippo.  I made the hippo for my nephew which I shared in a previous post.  The hardest part of the elephant is stitching on the eyes to make them match.  But the crochet stitches make a sort of grid, kind of like cross stitch, so I found that helpful to guide the placement of the stitches when I was trying to make them match.

I suppose that it all for now.  I have some studying that I should get back to on my day off from school.

Heather

Pepper and Honey Brown Rice with Red Quinoa

Tags

, ,

I made a pretty tasty little dish for lunch today.  I stopped at Sprouts on the way home from dropping off the kids to just grab a few items, when I saw this Royal Blend by Rice Select on a really great sale.  I love the Rice Select brand and this was a new one I’d never tried before.  It has light brown rice, red quinoa, and toasted freekeh.  Freekeh?  What the freekeh is that?  I had to look that one up, as it was new to me.  Apparently it is young green wheat grains that are toasted and cracked.  It has lots of fiber and fairly high protein content.  There you go, I love Google!  Here’s the article I read to get the info on freekeh if you’d like to read more about it.

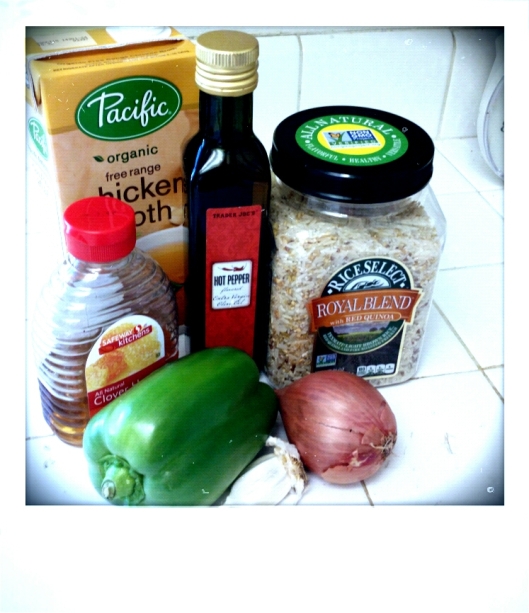
Anyhow, I grabbed some bell peppers that were also on sale and headed home to go through my fridge and pantry to figure out what else I could throw in with this for lunch.  Here is what I came up with:

shot_1421871788684

Just a few ingredients for this dish. My aunt bought me the hot pepper infused olive oil from Trader Joe’s for Christmas. I was excited to try it out!

Pepper and Honey Brown Rice with Red Quinoa

1 large shallot, chopped
1 bell pepper, chopped
2 cloves garlic, minced
2 Tblsp hot pepper infused olive oil (if you don’t have this you can use regular olive oil instead and add some red pepper flakes if you want the little kick or leave them out if you’d rather not)
1 cup brown rice and red quinoa blend
2 cups chicken broth (I love the Pacific brand from Sprouts, it has so much more flavor than the stuff in a can)
1 or 2 Tblsp honey, to taste
1 tsp Montreal Chicken Seasoning by McCormick (not pictured, I threw it in at the last minute)
Salt and pepper to taste.  I didn’t put in any salt at all since there is already some in the seasoning and in the broth, and I didn’t miss it.

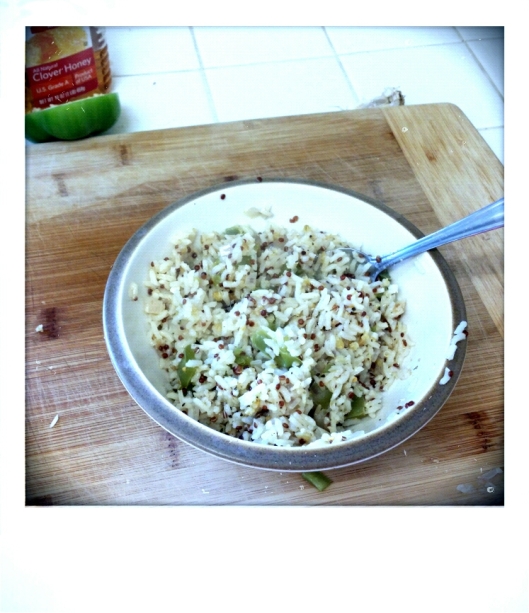
In a sauce pan, heat olive oil over medium.  If you’re using regular olive oil and red pepper flakes, you should let them gently simmer for a few minutes to really get the flavor going.  Then add shallot, bell pepper, and garlic and saute until the shallots and garlic are translucent.  Add the rice and broth, stir, and bring to a boil.  Then reduce heat and cover.  Let the rice cook for about 18 minutes, until all liquid is absorbed.  Add honey and Montreal seasoning and stir well to combine.  Let it cool for just a few minutes before serving.

shot_1421873711633

That’s it!  I think this would be a really good main dish if you added some chicken as well.  There really isn’t much heat to it, in my opinion, but I love really hot spicy food, so I may not the best judge if you don’t.  Sriracha, anyone?!  I hope you enjoy this dish as much as I did!

Go………create something beautiful today!
Heather

It’s Been Soooo Long!

Tags

, , , ,

I can hardly believe that it has been nearly 18 months since my last post to my little blog.  I’m so sorry to have been gone for so long, but boy, life over here has become crazy hectic!  I keep taking pictures of my projects and recipes, writing up patterns in my spare time, and thinking, “As soon as I make an ‘I’m Back!’ post then I can start posting these things.”.  Well, that didn’t work out so well.

So, let me fill you in a little on what has been going on in my life.  The big news is that I am not only officially a nursing student, but I am now halfway to my RN!  This has been my dream for the past 10 years and a goal that I have been actively working towards for the last 5 years.  This is the main reason I have been absent from my blog for so long.  Nursing school is crazy and amazing and hard all at the same time, but I am enjoying everyday.  Even the days I want to cry and pull my hair out because I can’t write another care plan or cram another lab value into my exhausted brain.  Well, maybe I don’t enjoy those days so much, but it’s all part of the journey.

NursingSchool

This is not my image, I found it on Pinterest and couldn’t find the source, so sorry I can’t give credit. But let me tell you, I have seen plenty of crying nursing school!

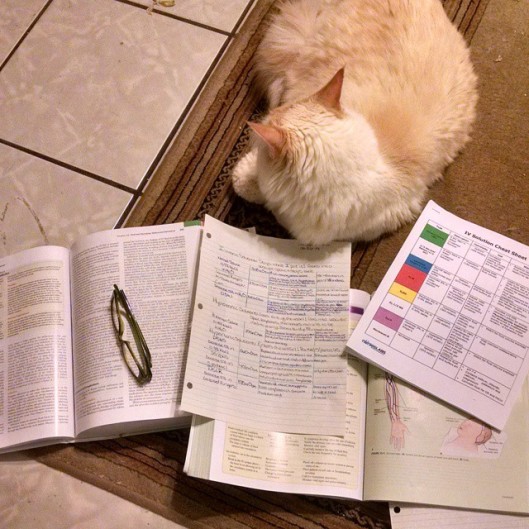
More often than not, this is what I'm doing after the kids are in bed.  Pepperoni usually keeps me company, often on top of whatever I'm trying to read.

More often than not, this is what I’m doing after the kids are in bed. Pepperoni usually keeps me company, often on top of whatever I’m trying to read.

Life is about the same outside of nursing school.  My husband is working for a company closer to home with better hours so that’s been a really awesome change for us.  My kids are still active in sports.  I have a soccer player and a football player.  They both want to do swim team, karate, water polo, surfing, basketball, and I think I heard mention of lacrosse the other day.  I don’t think there are many sports that they would say “no” to, but unfortunately we just can’t handle all of those activities right now.  Plus, they’re kids, I don’t want to work them so hard that they burn out on everything.  They also do chess club and art classes after school from time to time.

This is a picture of my oldest son's tackle football team.  This was his second year playing.  They had an amazing season this past year!  They were undefeated all the way to the Superbowl where they unfortunately lost.  Still, it was a great year and we made lots of memories and lifelong friends!

This is a picture of my oldest son’s tackle football team. This was his second year playing. They had an amazing season this past year! They were undefeated all the way to the Superbowl where they unfortunately lost. Still, it was a great year and we made lots of memories and lifelong friends!

I have still been taking a lot of pictures of my life and of course, my crochet.  I even learned how to knit, which is lovely, however I am terribly slow at it.  I’ll just post a bunch of pictures and if you have any questions about a pattern or anything, just shoot me a comment and I’ll get back to you!

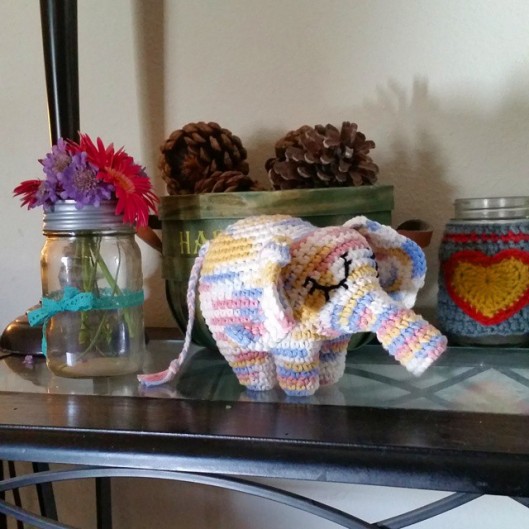
I made this adorable little elephant for my best friend's daughter.  She is due in March, I can't wait to snuggle her!!

I made this adorable little elephant for my best friend’s daughter. She is due in March, I can’t wait to snuggle her!!

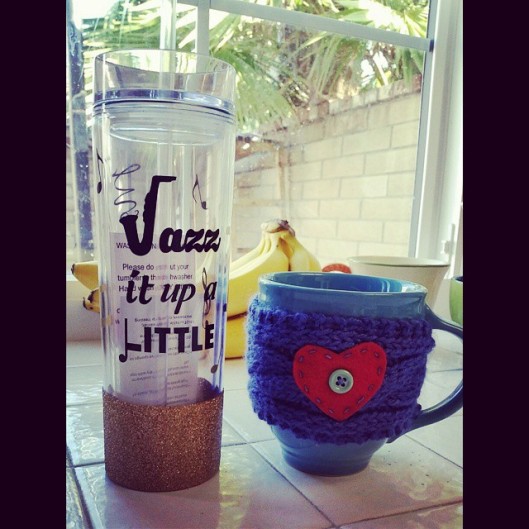
These were Christmas gifts for my boys' teachers.  I made the mug cozy (first knitting project ever!) and my talented friend made the jazz tumbler.

These were Christmas gifts for my boys’ teachers. I made the mug cozy (first knitting project ever!) and my talented friend made the jazz tumbler.

Please visit my friend Jodie’s Etsy page, SimplyChicBoutique74, to check out more of her items.  She makes some really fun stuff and she loves custom orders!  I gave her the saying I wanted for the jazz tumbler and she came up with the rest, which turned out even better than I expected!

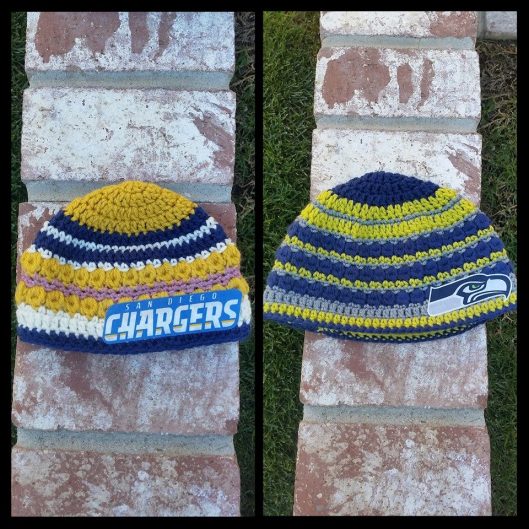
I designed this hat for my friend's daughter.  I've since been working on instructions for it in different sizes.  The Chargers hat is 6-12 months and the Seahawks hat is a large adult size.

I designed this hat for my friend’s daughter. I’ve since been working on instructions for it in different sizes. The Chargers hat is 6-12 months and the Seahawks hat is a large adult size.

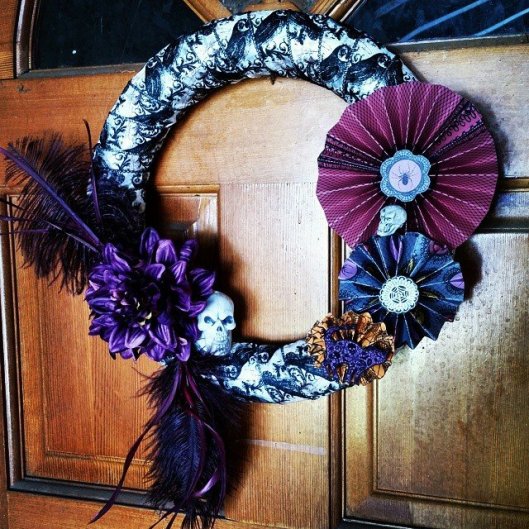
A quick trip to Joann's and another to Hobby Lobby and I had everything that I needed to whip up this Halloween wreath.  I love it!

A quick trip to Joann’s and another to Hobby Lobby and I had everything that I needed to whip up this Halloween wreath. I love it!

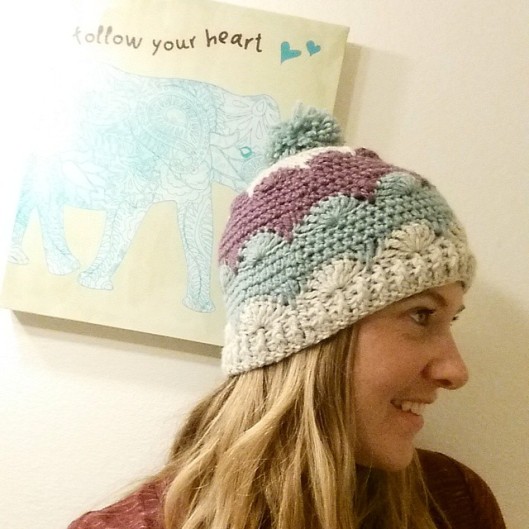
This is the Molly Hat from Inside Crochet which is a great UK crochet magazine.  If you're in the US like me, you can buy the e-magazine online, or find the hard copy in some bookstores like Barnes and Noble.

This is the Molly Hat from Inside Crochet which is a great UK crochet magazine. If you’re in the US like me, you can buy the e-magazine online, or find the hard copy in some bookstores like Barnes and Noble.

This is my version of the Astrantia cowl.  It's a free pattern on Ravelry.  I used the Fibre Company Road to China Light in Ruby for this.  It is probably one of my favorite yarns ever!

This is my version of the Astrantia cowl. It’s a free pattern on Ravelry. I used the Fibre Company Road to China Light in Ruby for this. It is probably one of my favorite yarns ever!

Well, I think that’s about it for now.  I have a few other projects that I’m working on and there are a couple recipes that I’d like to post as well.  Now that my “I’m Back!” post is complete, I can start sharing some of my other goodness with you guys again.

Go…..create something beautiful today!

Heather

WIP Wednesday: Giant Granny and Clamshell Cushion

Tags

, , ,

This is just a quick post to share the projects that I am currently working on.  I promised more yarny goodness in my last post, so I hope this delivers 🙂

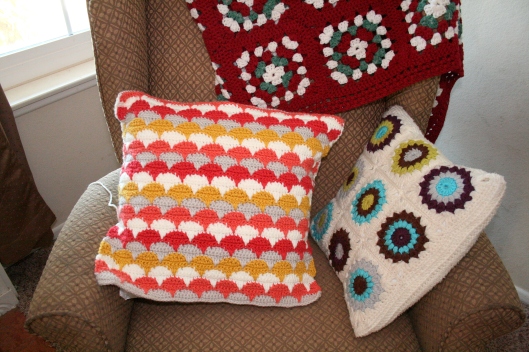
Clamshell Cushion by Dandelion Daze - design by Cherry Heart

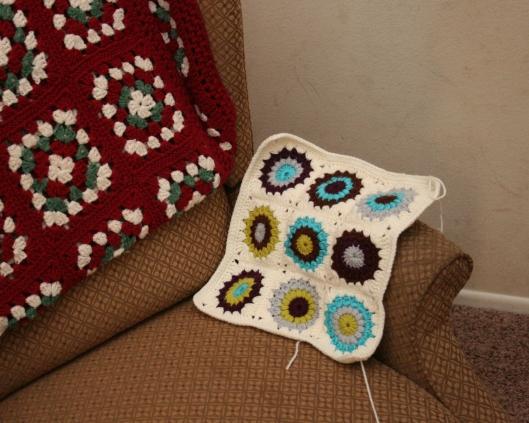
First, I’m still working on my clamshell cushion.  I was working on several projects at once, but this was my “for fun” project at the time.  I finally have the time work on this more than just a row or two at a time, so it’s finally coming together!  The pattern is by Cherry Heart and I just love her design!  It’s a little tricky for some, but once you get it down, it goes pretty quickly.

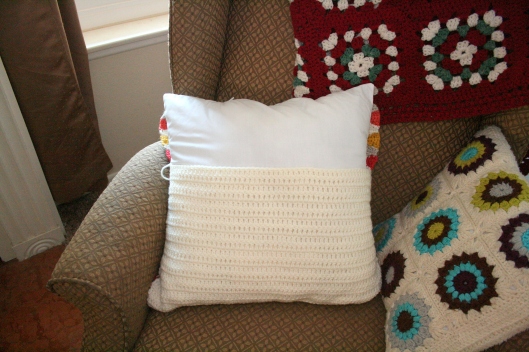
Crochet Cushion Back

I also used Cherry Heart’s tutorial for the cushion back.  I used it once before, on the sunburst cushion also in this picture, and I think it’s a little bit genius.  I’m done with the bottom half, and will be starting on the top half this evening.  All it will need after that is a border and some buttons.

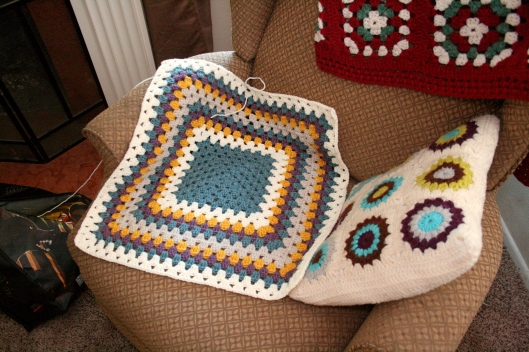
Giant Granny by Dandelion Daze

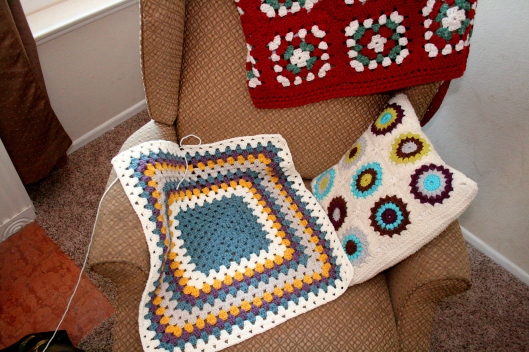
I’ve also started another giant granny square blanket.  I’m debating where to go from here, though.  I’m thinking about finishing off this square and then making several more in different colors to join together into a blanket.  Or I may just continue on with some more colors and make it one big giant granny.  We’ll see, I’m still kicking it around!  One thing I do know about this project is that I’m in love with these colors together.

Giant Granny by Dandelion Daze

Go………create something beautiful today!

-Heather
A Little Campy…A Little Crafty…A Lot Crazy

Tags

, , ,

The title itself basically sums up how my lovely life has been for the past few weeks.  Don’t get me wrong, it’s a good thing!

I realized a few weeks ago that we had somehow managed to let the whole summer slip by without a single camping trip.  That’s just not acceptable in my book, so I quickly reserved a spot for us on the last weekend before the kids started school.  We went up to the mountains near Big Bear, which is only 2 hours away, if we hit traffic.  If you live in SoCal like me, you know that you almost always hit traffic.

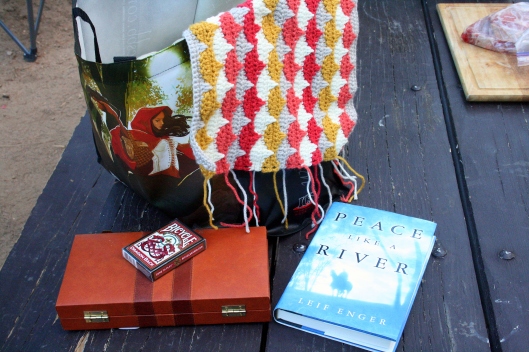
Camping essentials: cards, dominoes, a good book, and of course, yarny goodness.

Camping essentials: cards, dominoes, a good book, and of course, yarny goodness.

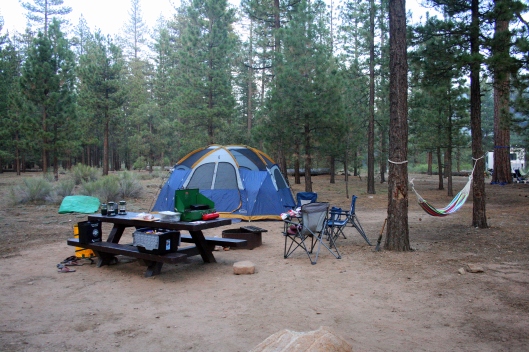
Once we got our campsite set up, the boys went off to find us some firewood.  They came back with mostly pine cones!

Once we got our campsite set up, the boys went off to find us some firewood. They came back with mostly pine cones!

This was just a quick camping trip, we only stayed two nights, but it was a much needed unwinding together as a family.  I just love hanging out with my boys around the fire, laying the hammock reading or working on my crochet, and of course cooking!  I love to cook, even on a camp stove.  The first night I cooked up some rib eye steaks and the second night I made clam chowder.  Food always seems to taste better when you’re camping, at least it does to me.

The week following our trip was when the crazy really kicked in!  The kids started the new school year, as well as the new soccer season.  I volunteered to be team manager for one of their teams and let me tell you, that’s not as easy peasy as it was when they weren’t playing on a competitive level!  To top off the crazy, I took my dog to the vet to get spayed in the middle of that week.  And then this week, my other dog broke her dewclaw, so I had both dogs at the vet this morning!  Thankfully the kids weren’t there since they were in school.  Otherwise, I think I would have left my sanity there when I brought my dogs home!

This is our newest addition, Sorsha.  She actually doesn't mind the cone of shame too much!

This is our newest addition, Sorsha. She actually doesn’t mind the cone of shame too much!  I’m sure she can’t wait to go to the bathroom sans the leash!

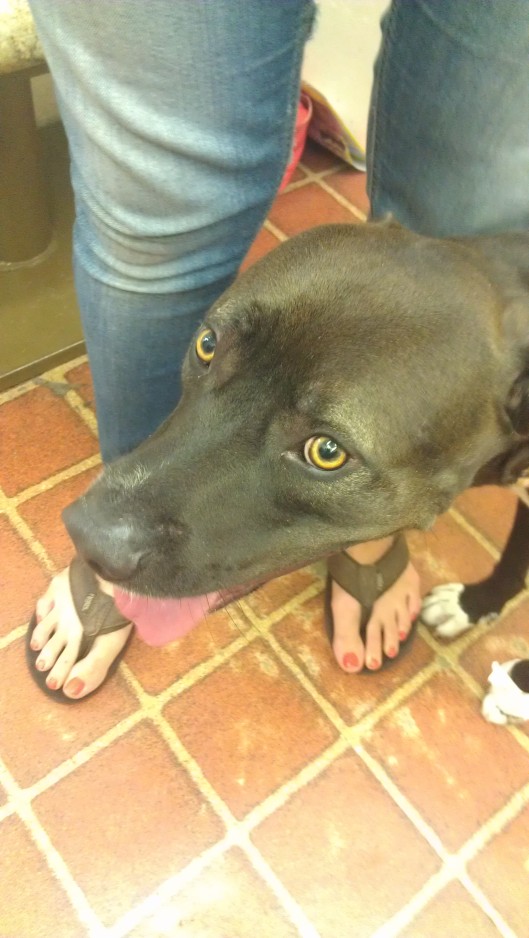
And this is my girl, Marley, or Marles Barkley as I like to call her, at the vet getting that broken dewclaw checked out.

And this is my girl, Marley, or Marles Barkley as I like to call her, at the vet getting that broken dewclaw checked out.  I’m glad I painted my toes the day before C stole my phone to take pictures while I talked to the vet!  I do have a picture of Marley’s toe, but it’s not pretty, so I’ll keep it to myself.

So, now I’ve got Sorsha home and without stitches, but Marley is at the vet still.  He didn’t have any appointments available today, so instead he had me drop her off and will make time between patients.  I should be hearing from him anytime now about what he’s going to do to fix her up.  I love this guy, I hate taking my dogs to anyone besides him!

I feel like there needs to be more yarn.  Of course, there can never be enough yarn.

shot_1376419773749 (2)

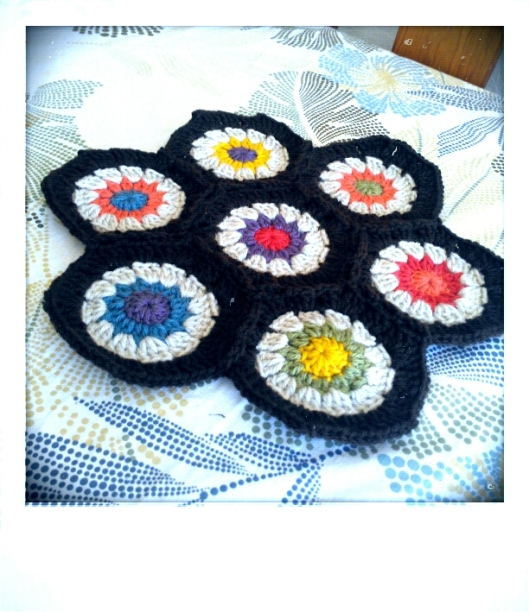
This was just a quick little project, which I whipped up for my cousin’s birthday.  She is visiting us right now from Connecticut and I haven’t seen her in years!  It’s a hot pad or just a cute little table decoration and she loved it.  I’m so glad.  For this, I used Lucy’s hexagon pattern and JAYG (join-as-you-go) method.

I promise, there will be much more yarn in my next post!  So, until then…

Go…….create something beautiful today!

-Heather
Book Review and Daisy Chain Coaster Tutorial

Tags

, , , ,

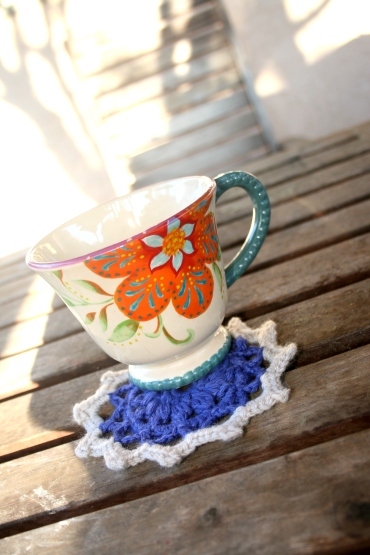
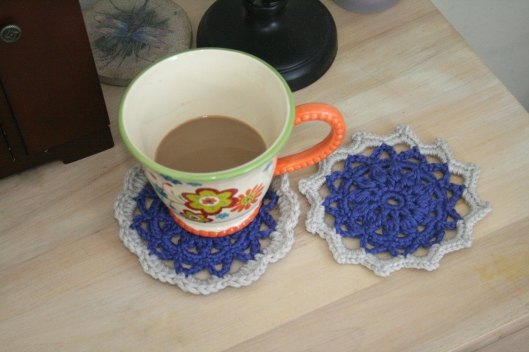
Daisy Chain Coaster

Last week I finally bought a crochet book that I’ve had my eye for a while.  I’ve been working on some bigger projects and was really in need of an instant gratification project, so I turned to my new book for some inspiration.  A short while later, after tweaking the pattern for one of the squares, I had some really cute coasters!

After the book review below, I’ll show you my mods to the pattern so you can make your own Daisy Chain Coasters.

IMG_3786

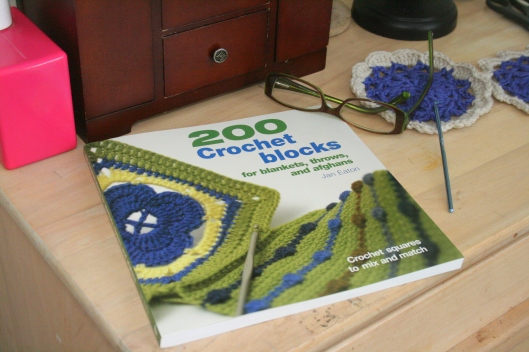
I can’t seem to put down Jan Eaton’s book, 200 Crochet Blocks.  I wanted this book after seeing some really beautiful crochet projects done with the squares, such as Cherry Heart’s Sampler Blanket and Coco Rose Diaries’ Lazy Daisy Scarf.  The book did not disappoint, the squares are lovely and there is something for any crochet taste.

Book Review: 200 Crochet Blocks

Also, I love that each square has a “mix-and-match” section at the end of the instructions which tells you other squares in the book that it would mix well with.  With 200 squares, it’s helpful to see some suggestions at a glance for selecting a mix of squares that will work nicely together in a blanket.  There is also a section about color that outlines how you can easily create your own color palettes.  Some of the blocks are shown in multiple color schemes to give you an idea how much color can change the look of the same block.
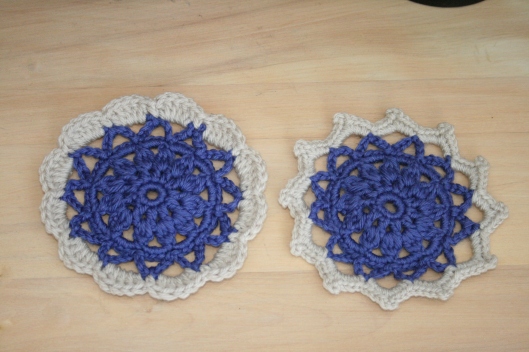
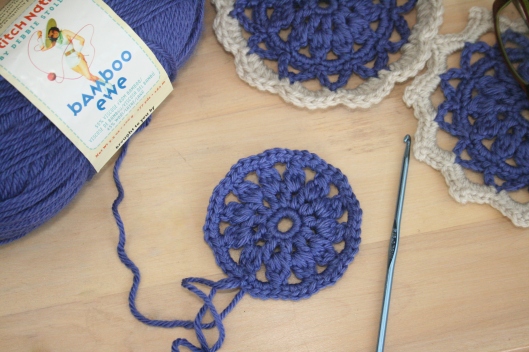
Daisy Chain Coasters by Dandelion Daze

Daisy Chain Coaster Tutorial
I used worsted weight yarn and an F (3.75mm) hook.  My coaster with the picot edge is 5.5″ in diameter and the scallop edged one is 5″ in diameter.
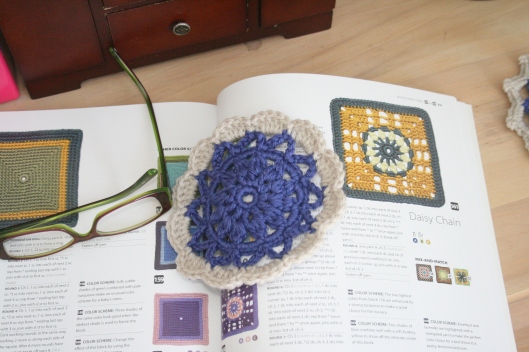
You can find the Daisy Chain square on page 99 of Jan Eaton’s 200 Crochet Blocks.
Complete Rounds 1-4 in one color per the pattern instructions.

Daisy Chain Coaster Tutorial - Rounds 1-4

This is what your coaster will look like after Rounds 1-4.

Daisy Chain Coaster Tutorial by Dandelion Daze

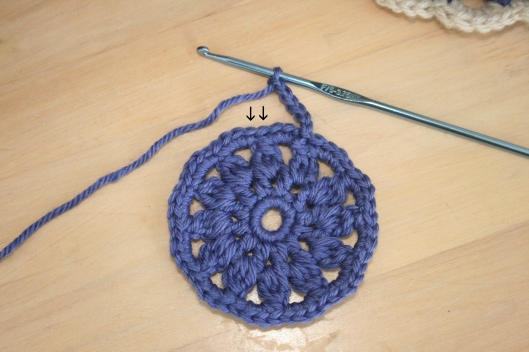
Round 5: Chain 6, then skip the next two stitches (don’t count the joining stitch) and then slip stitch in the the next two stitches where you see the arrows in the photo above.  Repeat around until you get to the end.  You will then have 12 loops of chain 6 spaces around.

Daisy Chain Collage

To end Round 5, we will do one slip stitch in the last single crochet of Round 4 and then use the seamless finish method with the first slip stitch of Round 5.  You can watch the video here to learn this method if the above photos aren’t clear enough.  Here is what you do: Picture 1 shows that you pull the yarn through after the last slip stitch as if to fasten off and then thread it through a yarn needle.  Picture 2 shows that you insert the needle under the first slip stitch of Round 5 and pull it through.  Picture 3 shows that you then insert the needle in the middle of the last slip stitch of Round 5 and picture 4 shows that you pull it under the back loop through to the back side of the work.  Then weave in the end as normal.

Daisy Chain Coaster Tutorial by Dandelion Daze

Round 6: Attach the same color with a slip stitch in any chain 6 space.  Chain 5, then make one single crochet in the next chain 6 space.  Continue around to the end, where we will end the round again with the seamless finish method.  This time, you’ll weave in the end from the beginning of the round first to make sure that the first slip stitch of the round is secure enough to use it for the seamless finish at the end.  Then complete seamless finish as instructed in Round 5.

Round 7 has two variations: Scallop Edge and Picot Edge

Scallop Edge: Attach the edging color in any single crochet of Round 6 with a slip stitch.  Chain one, then single crochet in same stitch as join.  Then, make 5 double crochets in the next chain 5 space.  Make one single crochet in the next single crochet.  Repeat this around until you get to the end of the round and join with the seamless finish method to the first single crochet of Round 7, not to the slip stitch.  Weave in the ends and you’re done!

Picot Edge: Attach the edging color in any chain 5 space from Round 6 with a slip stitch.  Next, chain 1, then make 4 single crochets, chain 1, 4 single crochets, all in the same chain 5 space.  Repeat in each chain 5 space from Round 6 to the end.  Attach with seamless finish method to the first single crochet of Round 7, not to the slip stitch.  Weave in the ends and you’re done!
Note: All stitches for this edging variation will be made in the chain 5 spaces of Round 6; none will be made in the single crochets of Round 6.

Daisy Chain Coaster Tutorial by Dandelion Daze

Please let me know if you have any questions at all about this tutorial.  I try to make it as clear as possible, but if something doesn’t make sense, I am more than happy to help you out!

Go………..create something beautiful today!

Heather

A Crafty Mish Mash…and Hummus

Tags

, , , ,

I don’t like being sick.  I don’t know anyone who does, but this bug that I’ve got right now is really a nasty one!  And sharing is caring, you know, so I gave it to my husband and he’s now down for the count, as well.  Thankfully, the kids have been spared.  So I’ve had plenty of time to lay around this past week and work on some projects while catching up on old TV shows.  Right now, we’re watching The Shield, which we never watched when it aired, and it’s really good!

Months back, I made several Sunburst Granny Squares with no real intent for what I was going to do with them.  This is one my very favorite motifs to make, they come together very quickly and I just love the look of the stitches.

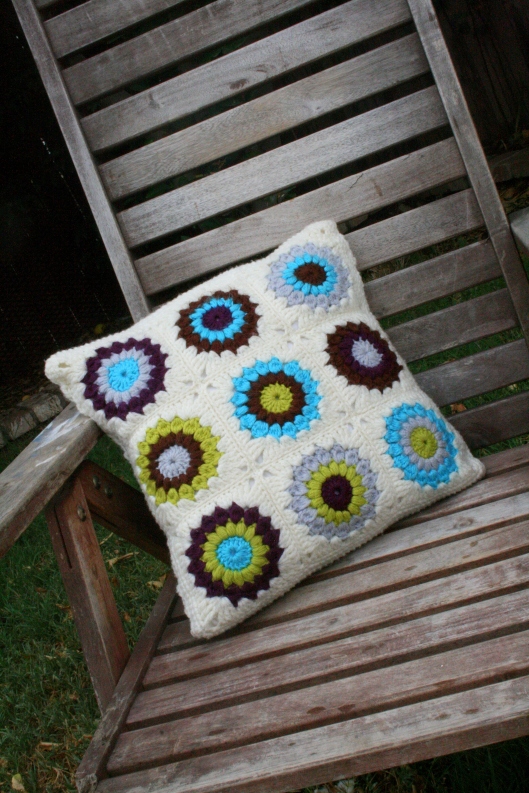
Sunburst Cushion by Dandelion Daze

I’ve been wanting to make a crocheted cushion for a while, so when I finally got around to buying a pillow form, I dug the squares out of the bottom of one my many bags of yarn and started hooking them together.  I attached them with slip stitches through the outer loops.  Lucy from Attic24 has a great tutorial on this here.

Sunburst Cushion by Dandelion Daze

Since I didn’t make these squares with a cushion in mind, it turned out they were a bit too small for the 12×12 pillow form I wanted to use.  So, after joining them together, I did a row of hdc all the way around which pretty much did the trick of making the front big enough.  I added 3 extra hdc in each corner stitch to avoid buckling.

Then I crocheted the back of the cushion right onto the front, using Cherry Heart’s tutorial here.  She has two tutorials on this, but it worked just fine for me using the first only.

Sunburst Cushion by Dandelion Daze

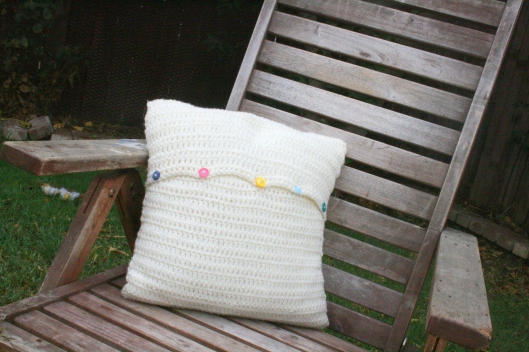
Finally, I added some buttons to secure the back.  Isn’t it cute?!  I really love how it turned out!  My sister-in-law is going to take it home but I have several more of these squares in the same colors, so I am going to make another to stay on my couch.

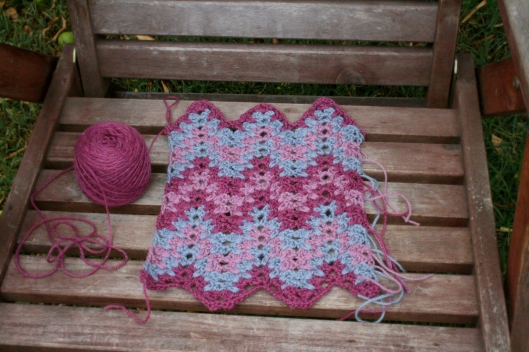
Ripple Cowl by Dandelion Daze

I am in love with this yarn that I am using for a ripple cowl.  I bought it from the Mendocino Yarn Shop while on vacation a few weeks ago.  It is sooooo soft!  The yarn is Canopy Fingering by The Fibre Company.  It’s a blend of baby alpaca, merino, and bamboo.  I am using three colors: kaffir plum, rosehip, and blue crown.

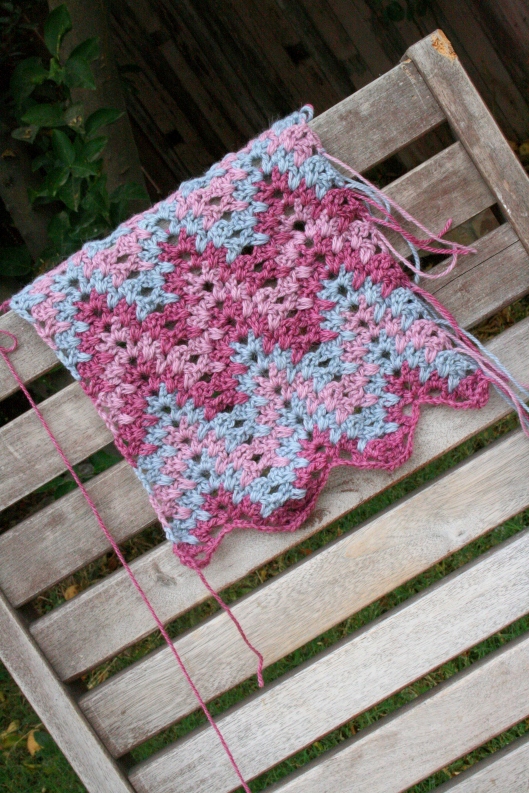
Ripple Cowl by Dandelion Daze

This pattern is a Japanese chart that I saw on Pinterest months ago and have been admiring ever since.  I use mostly worsted weight yarn, but I knew I wanted to use a light yarn for it and this was perfect.  You can find the chart here.  It’s all in Japanese, but is pretty straightforward as the chart is broken down into the first several rows.  If enough people are interested, I wouldn’t mind writing up a post on how to follow this chart, so let me know if it’s difficult for you to decipher.

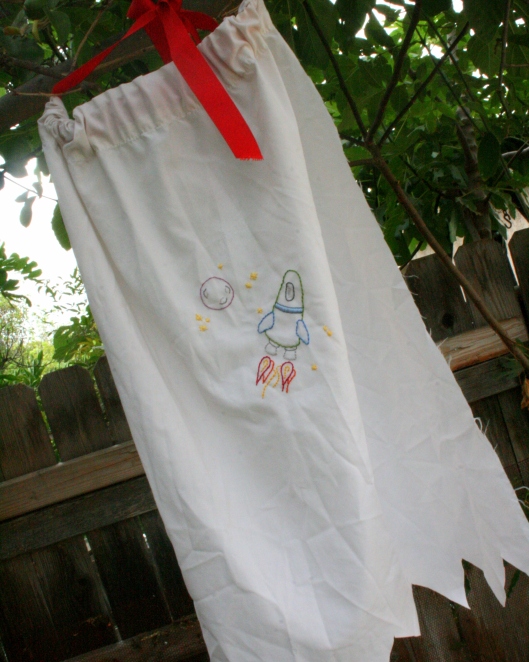
Space Cape by Dandelion Daze

What little boy doesn’t love wearing a cape?  I have one who just can’t have enough capes!  When I found this adorable embroidery pattern by Love the Blue Bird, I asked C what he would like me to put it on and the answer was, of course, a cape.  I had a few capes left over from his birthday party last year, so I put one in an embroidery hoop and got to work.  I used to do a little cross stitch years and years ago, but I haven’t done any embroidery before.  I think it turned out pretty well.  C wants me to add an alien, an astronaut, and Jupiter!  So, I have to look up some more patterns and add them to his space cape.  His birthday party is this weekend and he says that he wants to wear this cape to the party.

If you want to see how to turn a pillowcase into a cape like this one, check out my post about C’s birthday party last year, here.

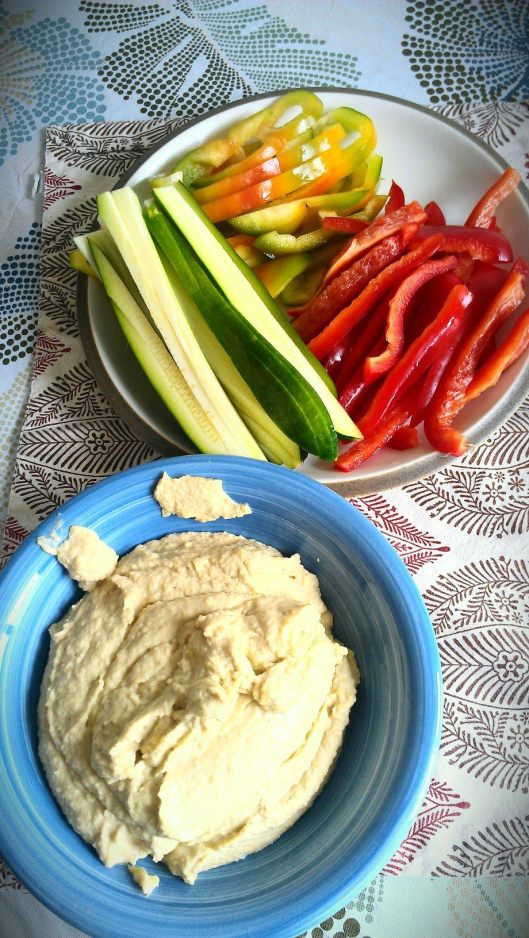
Hummus and Veggies

And finally, the hummus!  This is one of our favorite snacks.  I have tried many, many recipes for homemade hummus and have found what I think is the best recipe out there.  It is Alton Brown’s recipe, called Hummus for Real.  I’ve never made the slow cooker chick peas called for in the recipe, I just use a 16 oz can of chick peas (also called garbanzo beans), drained and rinsed.  I buy the tahini from Sprouts, which is a farmer’s market style store.  Places like Whole Foods and Trader Joe’s should carry it as well.

I think this is the best recipe out there and it is a great base for making flavored hummus.  I’ve added in roasted red peppers and it’s killer.  Also, you can grill some jalapenos or Anaheim chiles on charcoal grill and add them to the hummus.

I’m off to take some more cough medicine and hopefully ditch this awful bug!  The doctor said I’ll probably cough like this for another week, though.  I have a birthday party to get ready for, so I’ve got to fight through it!

Go………..create something beautiful today!

Heather

I’m Still Here!

Tags

, , ,

Hello to all of my lovely readers!  I’m not sure how many of you are still here, I’ve been gone from my little blog for so long it seems.  Sorry about that!  Life has a way of taking over my bloggy life and next thing I know, it has been months since I have written a post.  The good thing is that I’ve been busy working away on some great things in my life and that nothing terrible is at fault for keeping me away (thank you to the readers that sent me nice little messages over the last few months checking in with me, everything has been busily wonderful!).

This post has a lot of pictures of what I’ve been crocheting and where I’ve been traveling, so I hope you don’t mind if I just let the photos do much of the talking!

IMG_2992 IMG_2983 IMG_2980

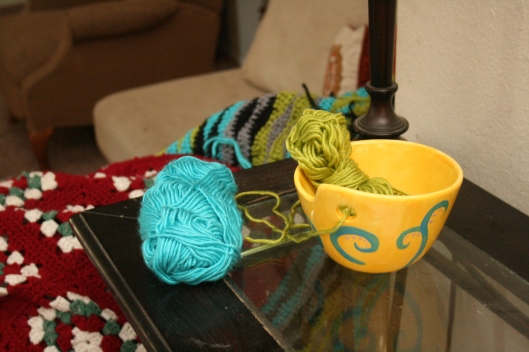
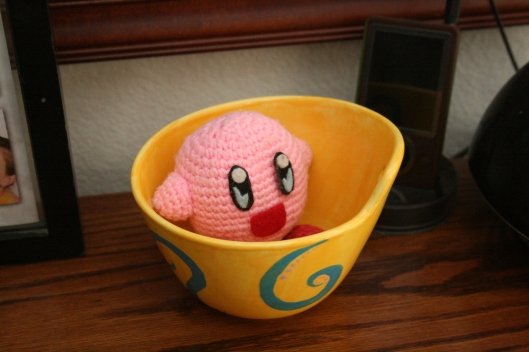
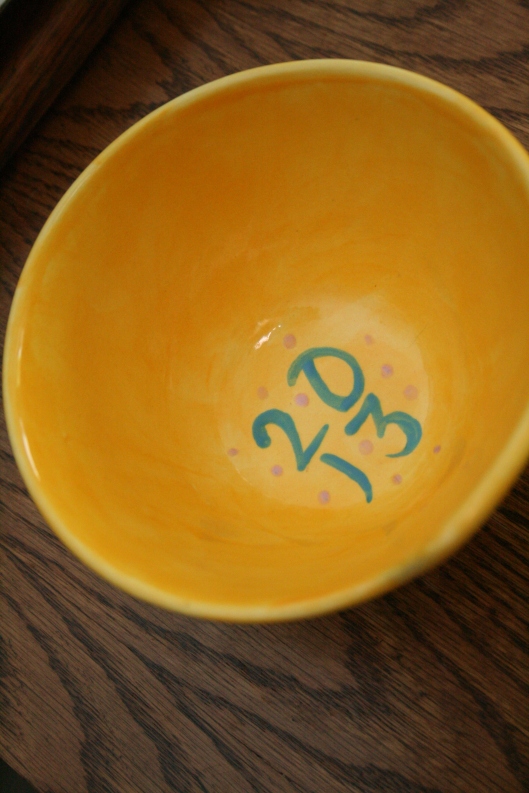
For Mother’s Day, my husband and boys took me to the local ceramics shop and we painted a few items.  They had this noodle bowl which has a hole in it for holding chopsticks.  I, of course, immediately thought “yarn bowl!!!”.  When I picked it up after they fired it, I was so happy with how lovely it turned out.  And, naturally, C thought it would be a great place for Kirby to hang out when I’m not using it for yarn.

IMG_2964 IMG_2958

IMG_2967

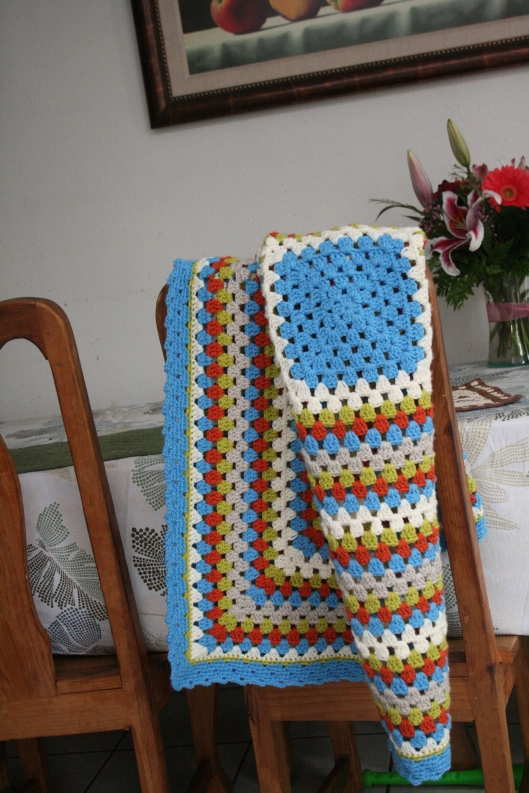
Our friends are expecting a baby boy in a few months and of course I had to make a blanket for the little guy.  I can’t wait to meet him!  We have been friends with this couple since high school.  I have actually known the dad since we were 12 and he’s been my husband’s best friend since they were in Jr High!  Which is kind of funny because although my husband and I had a lot of mutual friends, we went to different schools and didn’t meet until I was 19.

981481_10200761338429830_48549954_o

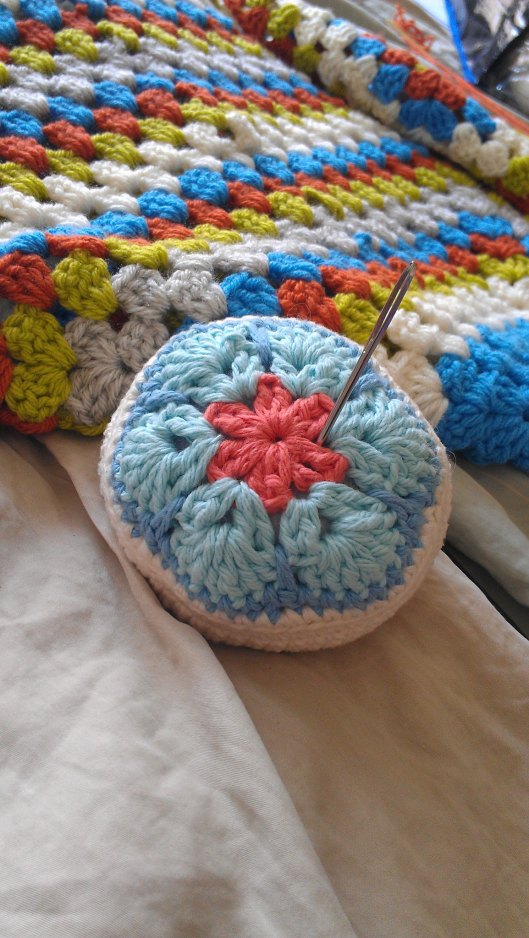
This little lovely is a pincushion that I made and I think several more are in order.  It’s just a fun little project and keeps my yarn needles from getting lost.  You can get the pattern over at Cherry Heart.  She has a wonderful blog that I really enjoy browsing, so do go take a look!

IMG_2948

This is just a little sneak peek at the colors I’ll be using for a clamshell cushion.  This is another of Cherry Heart’s patterns and I’m really enjoying it.

IMG_3108 IMG_3155 IMG_3209 IMG_32151000056_10200895371620576_1132651207_n

We took a very fun trip up to Mendocino, CA.  It’s about an 11 hour drive from where we live, so it was quite the drive, but so worth it!  We were there to see our friends get married.  The ceremony was right on the bluffs, with the ocean in the background and it was just gorgeous.  Of course, I had to find the LYS in town and I picked up some very lovely Canopy Fingering.  It’s blend of baby alpaca, merino, and bamboo and it is crazy soft!  I’m using it to crochet a ripple cowl from a Japanese chart that I’ve been admiring for quite some time.

I’ll be posting a new pattern soon, as well as a few new recipes.  I’ve so missed being on my blog and I hope ya’ll forgive my absence!  Go……….create something beautiful today!

-Heather

FREE Crochet Pattern: Chevron Infinity Scarf

Tags

, ,

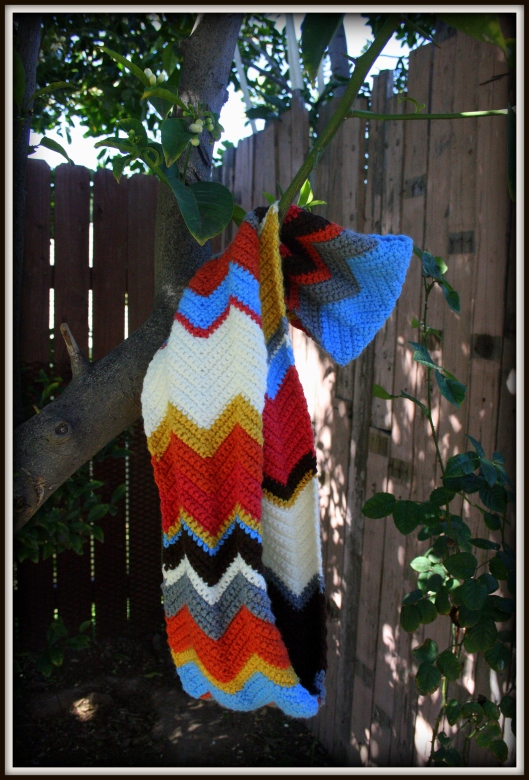
I have a new pattern to share today for my Chevron Infinity Scarf.  I saw a similar scarf for sale on Etsy months ago but it had been sold and there wasn’t a pattern available for purchase.  So after having it in the back of my mind for months, I finally tried my hand at making my own.

Chevron Infinity Scarf by Dandelion Daze

Here is what I came up with!  You can use any combination of colors that you’d like.  I wanted something bright and was going for kind of tribal/Azteca colors.  I don’t think the colors looked exactly “tribally” together, but I still love the result.  I chose 7 colors and crocheted them in a random order.  I used the random stripe generator to get started and then made up my own scheme after I got started.  So, pick out some colors and follow my pattern instructions below.  Have fun!

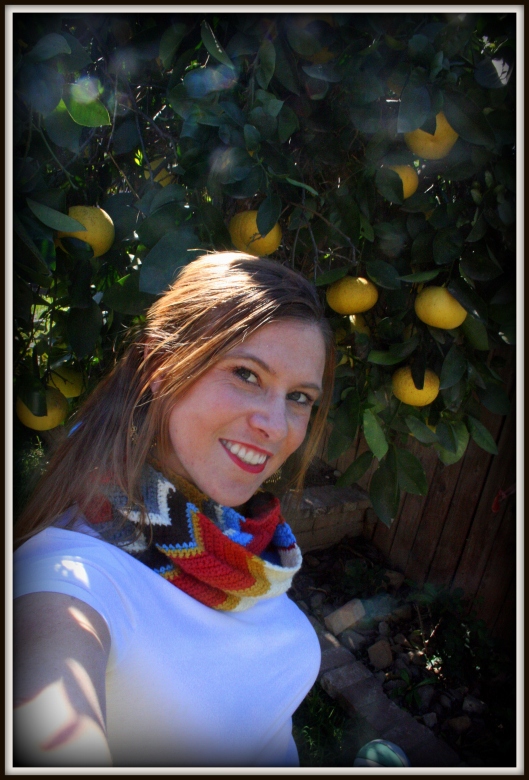
Chevron Infinity Scarf by Dandelion Daze

Chevron Infinity Scarf

Difficulty: Easy – Great beginner project!
Stitches used: ch and sc

Supplies:
Hook: G (4.25mm)
Yarn: Worsted Weight in various colors to achieve your desired look.  I used a combination of Loops and Threads Impeccable and Vanna’s Choice.  Sorry, but I don’t know the yardage for this project.  That also differs on the length you choose to make it.
Yarn needle for weaving in ends.

Notes:
*The drape is a little stiff with a G hook, so you may want to try a larger one, like an I.  I was hoping it would soften up with wear, but it’s still a bit stiffer than I’d like after having worn several times over a few weeks.
*Start and end with the same color to help hide the join when you attach the two ends together in a circle at the end.
*To make the scarf wider, extend the length of the chain in increments of 8 (so instead of 32, chain 40 or 48).
*Crocheting over the ends is a real time saver since there can be a lot of ends to weave in if you change colors as often as I did.  Just hold the tails behind your work along the top of the stitches from the previous rows.  When you make your stitches, insert the hook under the stitch indicated and include those tails.  You’ll work right over them and they’ll disappear like magic!

Instructions:
Ch 32
Row 1: 1sc in 2nd ch from hook, 1sc in next 6 chs, 3sc in next ch, 1sc in next 7 chs, sk next ch, 1sc in next 7 chs, 3sc in next ch, 1sc in next 7 chs to end.  Turn.

Row 2: Ch1, 1sc in 1st sc, sk 1 st, 1sc in next 6 sts, 3sc in next st, 1 sc in next 7 sts, sk 2 sts, 1 sc in next 7 sts, 3sc in next st, 1sc in next 6 sts, sk 1 st, 1sc in last st.  Turn.

Repeat Row 2 until scarf is desired length, changing colors as little or as often as you’d like to achieve your desired color scheme.

Join the two ends together to make a circle.  You can sew them together or crochet them.  I chose to crochet them together with slip stitch.  It’s a little funky, because you have to hold the ends at an angle to match up the peaks and valleys of the chevrons as you go along.

Fasten off and weave in ends.  You’re done!

Chevron Infinity Scarf by Dandelion Daze

I hope you’ve enjoyed my pattern and will make your own scarf soon!

Go………create something beautiful today!
-Heather

PS…I am linking up this post over at Hookin On Hump Day at My Merry Messy Life.  Go check out all the other fun projects that have been linked up to the party!

What’s for Dinner? Lobster and Crab Ravioli with Garlic Cream Sauce

Tags

, , , ,

This dinner of Lobster and Crab Ravioli is one that my husband requested.  I was a bit surprised when he asked me to make this.  He likes very simple meals and is not a big fan of pasta (polar opposite of my palette!).  Also, the man had never tried lobster in his life until we started dating.  I’ve introduced him to many new foods, most of which he doesn’t ever seem to be overly excited about.  Although lobster has stayed a favorite of his, I was surprised that he’d ask me to cook up a few perfectly good lobster tails, mix a bunch of other stuff in there and stuff it inside some pasta.  Sounds great to me, but very unlike something he would request.

But I am so glad that he did request it, because it was delicious!  And I also got to do something out of the ordinary in the kitchen which I’m always a fan of.  There are a lot of steps but it was worth it.  C, my 4-year-old, was totally freaking out when I put this on the table.  He heard “lobster” and decided to start crying.  But once he did try it because it was that or eat nothing for dinner, he devoured it!  He pointed at the few bits of lobster and crab filling left on his plate and said he wanted more of “that part”.  When I informed him that “that part” was lobster and crab, he just started laughing.  So all of that to tell you two things: first, it’s so yummy that your picky 4-year-old will eat it and love it and second….well, I don’t remember what the second thing was because I wrote that part yesterday and can’t remember what I was going to say.  :/

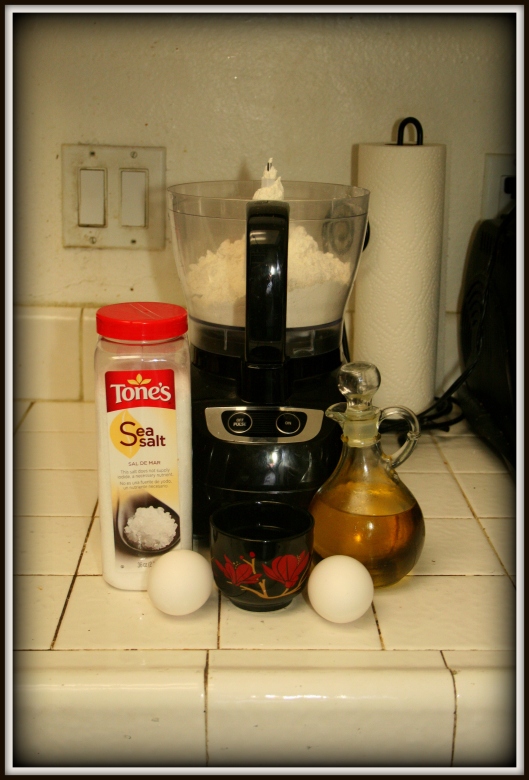
Okay, so to get started, you need to make the pasta dough for the ravioli.  Grab these items here:

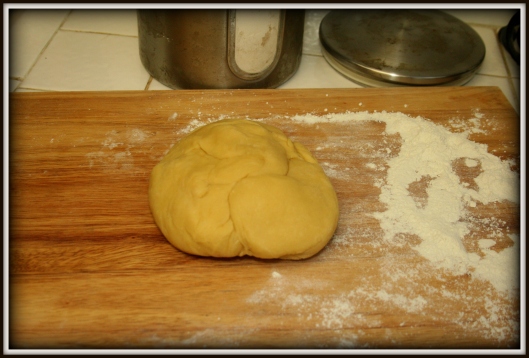
Homemade Pasta Dough by Dandelion Daze

Homemade Pasta Dough

2 cups flour
2 eggs
1/4 cup olive oil
1/2 tsp sea salt
3 Tbsp water

You’ll combine everything in a food processor and process it together for about 30 seconds or so.  If it’s too wet and sticky, add some more flour.  If it’s too dry, add some more water.  When it’s a nice consistency, turn the dough out onto a floured cutting board or counter top and knead until it is soft and smooth.

Homemade Pasta Dough by Dandeion Daze

Now you’ll wrap it up and place it in the fridge for about 30 minutes while you make the filling for the ravioli.  Make sure you use the dough within a couple hours!

Now, for the filling and the sauce…..

Lobster and Crab Ravioli with Garlic Cream Sauce

For the filling:
2 or 3 lobster tails, about 4 oz each
6 oz lump crab meat
1 clove garlic crushed
2 Tbsp tomato puree
Juice 1/2-1 lemon, depending on your taste…and juiciness of your lemon.
1 tsp thyme
2 Tbsp cream cheese, softened
Dash cayenne

For the sauce:
1-1/2 cups of reserved lobster water (don’t dump the water after boiling the lobster!!)
1 tsp chicken base or chicken bullion cube
1 cup half and half
2 cloves garlic, crushed
1/4-1/2 cup parmesan cheese, grated
Salt and Pepper

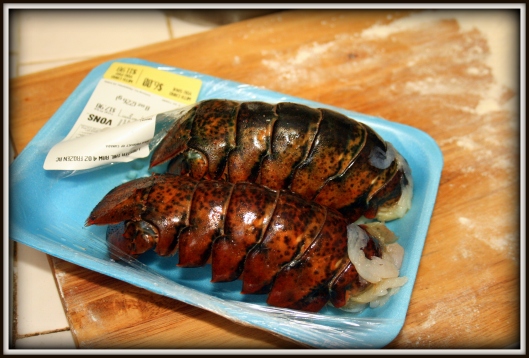
Okay so first you’ll need to boil the lobster tails for about 7 minutes.  I only had two tails, but I’ll get three next time.

Lobster and Crab Ravioli by Dandelion Daze

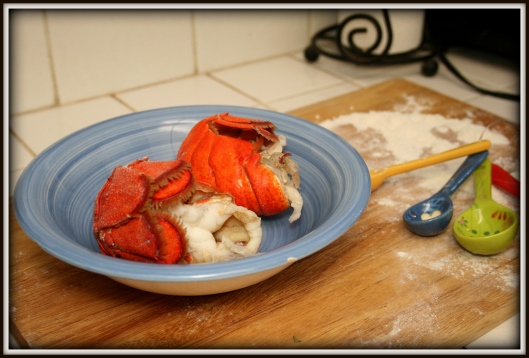
No wonder C didn’t want to eat them, they do look funky when you’re only 4!

Lobster and Crab Ravioli by Dandelion Daze

Now, leave the water on to boil and reduce down as you prepare the filling.  You want it to get down to about 1-1/2 cups.

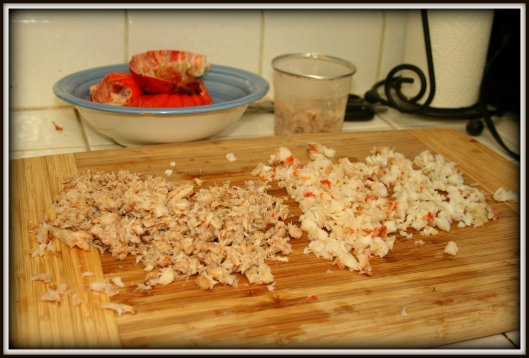
Take a pair of kitchen shears and just cut the tails open down the back and bottom and remove the meat.  You’ll chop all of that up.  Chop up the crab meat into about the same size chunks.

Lobster and Crab Ravioli by Dandelion Daze

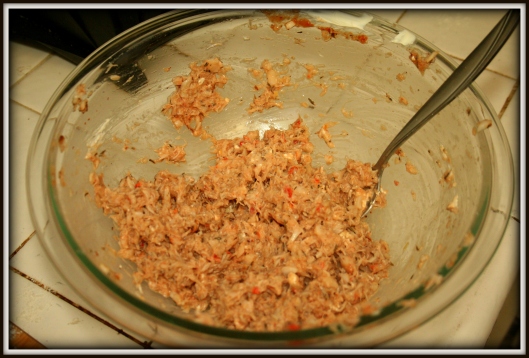
Transfer the crab and lobster meat into a bowl.  Add the remaining ingredients for the filling to the bowl and stir everything up until it is all combined.  Give it a little taste and adjust any seasonings as you’d like.

Lobster and Crab Ravioli by Dandelion Daze

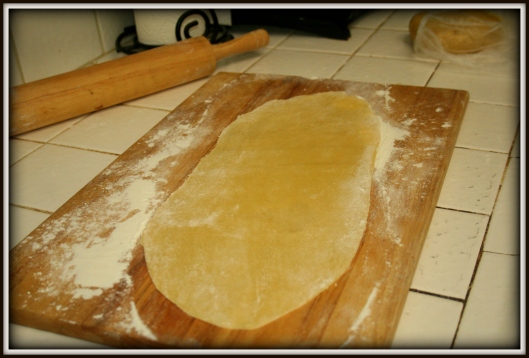
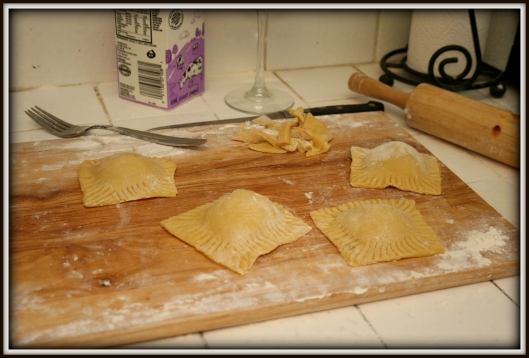
Now, this is the fun part!  Remove the pasta dough from the fridge and grab a chunk of it.  On a floured cutting board or counter top, roll out the dough into a long thin rectangle.  Not too thin, as you don’t want the ravioli to fall apart when cooking.  Set this rectangle aside and do the same with another, trying for the same approximate size and shape since these will be top and bottom pieces.

Homemade Pasta Dough by Dandelion Daze

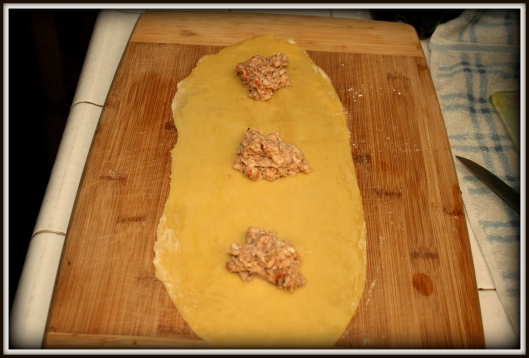
Once you have two rectangles, brush one with an egg wash which will ensure the top sheet of pasta sticks to it.  Now, place dollops of the filling on the piece you brushed with the egg wash.

Lobster and Crab Ravioli by Dandelion Daze

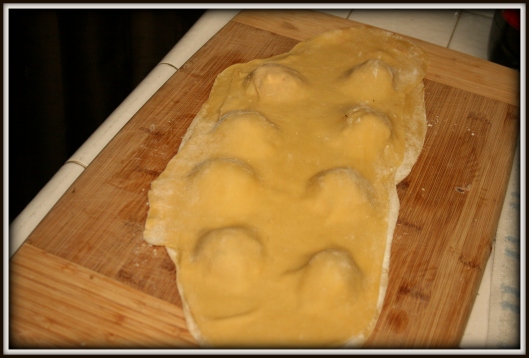
Then, place the top piece on and carefully push down the dough around the filling so the two pieces stick.  Try to not leave any air inside the pocket, as it could cause the ravioli to burst when you cook them.

Lobster and Crab Ravioli by Dandelion Daze

Now, cut the ravioli into square size pieces.  You don’t need to leave too much pasta around the edge of the pocket, but don’t cut it too close or else there won’t be enough to really seal it.  If you’ve ever eaten ravioli before, I’m sure you can figure it out!

Take a fork and then just crimp around the edges of each pocket so that it’s sealed.

Lobster and Crab Ravioli by Dandelion Daze

Now, you’re ready to make the sauce!  In a saucepan, bring the reserved lobster water to a boil and add in the chicken base and crushed garlic.  Let that dissolve and get really fragrant, then reduce the heat to med-low and add in the half and half, salt and pepper and cheese.  I only added about 1/4 cup of cheese, as I didn’t want the sauce to be too heavy.  But it definitely wasn’t getting thick enough no matter how long I let it simmer without it, so I added in the cheese to help things along and it was so good!  Anyhow, whisk everything together pretty much constantly over a low heat setting until the cheese is all melted, which shouldn’t be long.

Finally, carefully place the ravioli in a pot of boiling water and cook for about 3-5 minutes.  It took a few minutes longer than I expected with fresh pasta for mine to cook, closer to 6 minutes, so just keep an eye on it.  Also, brush the edges with a little more egg wash if they begin to dry out at all while you’re making the sauce.

Remove the ravioli from the water with a slotted spoon and place three or so on a plate.  Top with the sauce and serve right away.

At this point, we were really hungry!  So of course I didn’t take any pictures of the finished dish before we ate, I just figured I would do it with the leftovers after we were done.  But…..there weren’t any leftovers!  So I hope you can use your imagination for how this looked all put together!  I guess I’ll just have to make it again (oh darn!) and update the picture later.

I hope you are all enjoying your day wherever you may be!  Go…………create something beautiful today!

-Heather